
If you feel like you have a burst of creativity, perhaps it is time to do some needle felt! People throughout the world use this skill to make different forms. In this article, we will present you the technique, and teach you how to needle felt.
Before we get to the process, we will get to the craft itself, as well as tools and materials you should use user. We will even give you some suggestions on what to make with needle felting. Let’s not waste any more time and show you how to start practicing this craft today!
Chapter 1. What do you know about needle felt?
Needle felting is a craft that belongs to the category of handcraft. It involves using a needle to work with felt fabric and create various shapes and forms. Since felt is a versatile material, you have a wide range of opportunities when it comes to what you can make with this fabric.
The great thing about needle felting is that it is suitable for both beginners and professionals. Although we might not recommend it for children because you need to use sharp needles, teenagers and adults will quickly learn how to needle felt.
Chapter 2.What Tools Should You Have to Needle Felt?
Please note that we used the term tools a bit lost here. However, we intend to talk about the items you will need to start a needle felting project.
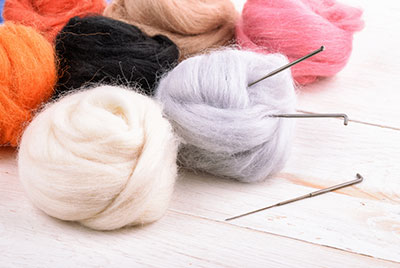
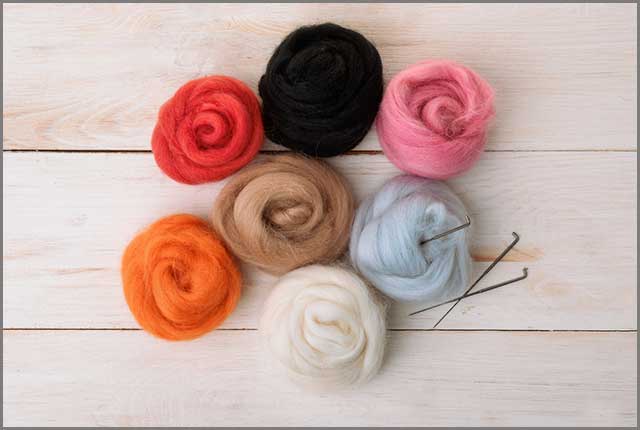
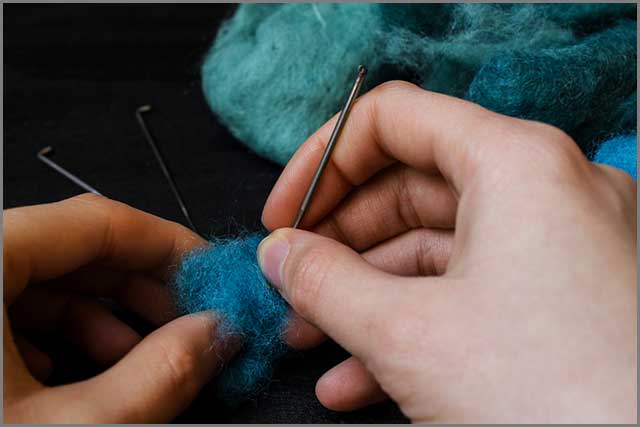
In short, you will need a felting needle and mat, as well as a specific fabric to work with during the process.
2.1. Felting Mat
A felting mat is a place where you will put the wool. It is important to be soft to keep you safe from poking and to prevent damaging the table or other surfaces below.
You can choose between the following types of material for the mat:
1. Sponge foam – it is very elastic and resistant to changing shapes. Its elasticity may reduce the speed of the process, but on the plus side, this material is quite durable.
2. EPE foam – it is very smooth on the outside, which ensures that the wool doesn’t stick to the surface. It is an excellent choice for amateurs and simple projects, but keep in mind that it is not that durable.
3. Bottom brush – it is the priciest option on the list, but it will be a long-term investment. It has bristles that enable the wool to adhere to them. It would be wise to spread a cotton cloth over the brush to make cleaning the hairs easy.
Chapter 3.How to Choose Felting Needles
A felting needle is an integral part of your needle felting equipment. It is important to note that felting requires specialized needles, and we can divide them into several categories depending on their size and type.
3.1. Felting Needle Sizes
When it comes to the size, the gauge range varies from 32G to 42G. If you go with 32G, you will choose the thickest needle out there. On the other hand, 42G secures the thinnest available needle on the market.
You should begin felting with a thick needle as it will make initial shaping easier. As you see, you need to move on to detailed shaping and to fine-tune the material; you may start using thin needles.
There is no exact rule when you should switch from a thick to thing needle as it will depend on your felting skill and style. Many users tend to do most of their work with a medium needle and only resort to extreme gauges if necessary.
3.2. Felting Needle Types
Here is an overview of available felting needle types:
1. Triangular – the affordability makes this needle a popular choice for beginners and amateurs. It has three blade faces, and they form a shape that reminds of a triangle. These needles are available in all thicknesses.
2. Star – these have four blade faces, which is why their way reminds of a star. Thanks to the new sun, you may speed up the felting process.
3. Spiral – it has three blade places, but they make a shape that reminds of the spiral. It allows you to work fast while ensuring the gaps on the surface will remain tiny.
4. Spiral-star – you could say that this four-barbed needle brings the best of both spiral and star needles. Its most significant benefit is that you can work with fibers below and above the working surface simultaneously.
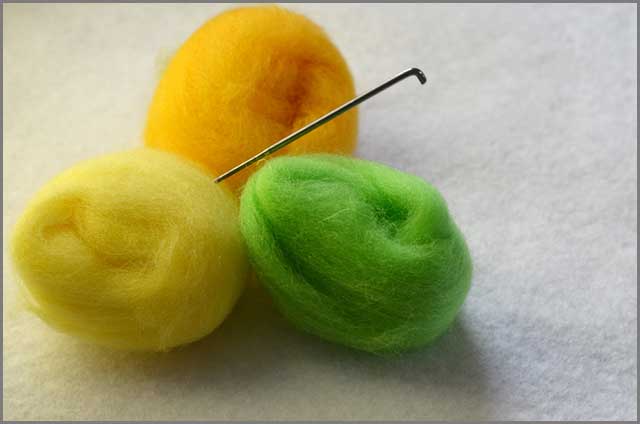
Chapter 4.Which Materials Can You Use for Needle Felting?
We already established that felt is the material you will work with, but there are many subcategories of this fabric to consider. Although polyester felt has its purposes, it may not be the top choice for needle felting.
The preferred material for this process should be wool. Now, you can also choose several different wool types depending on how processed the content is.
We usually divide wool felt in four different categories:
1. Raw fleece – the word natural is quite self-explanatory. You will receive the actual unprocessed wool that someone took of the back of a sheep! You will need to do some processing to make it suitable for felting, but you will feel proud once you finish everything!
2. Locks – this is still raw fleece, but someone has washed it and removed the dirty parts for you. Although it is a clean fleece, no one has combed or carded it, although you may encounter dyed locks. You can consider this material if you want to be creative and use curls in your project.
3. Roving – you will also find this material under the name “tops.” It is the most frequently used wool type for felting projects, especially if you are a beginner. Someone has already taken care of combing and washing, and all fibers of the wool are facing the same direction, which should make it easy to work with the yarn.
4. Batts – you could say that this is fully-processed wool. It has been carded, which resulted in fibers going in various directions. It may be tricky to find, but it can also be easy to work with, especially since it is easy to pull the needed chunks from the material.

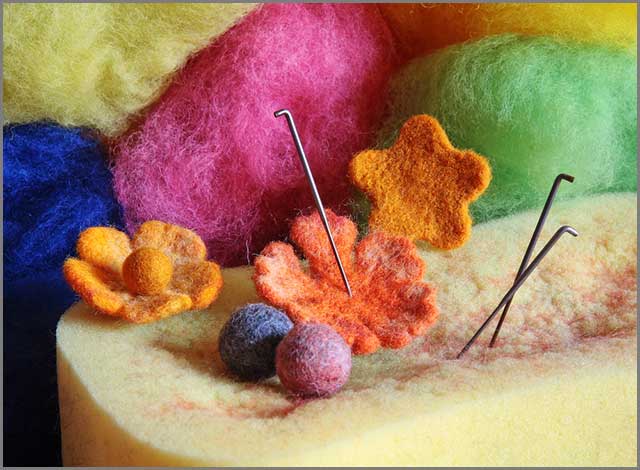
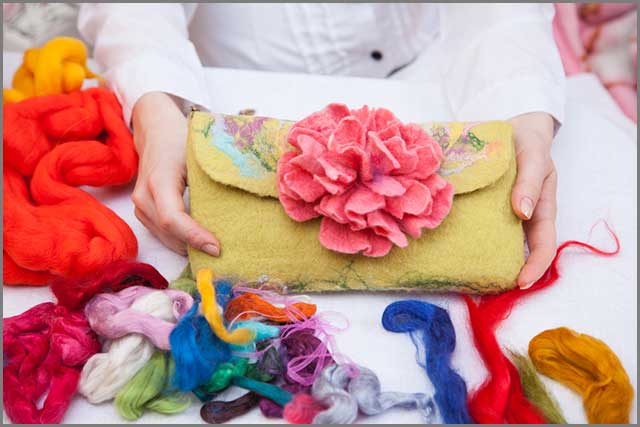
Chapter 5. What Can You Do with Needle Felt?
In the beginning, you may want to stick to basic shapes. However, once you become a master of needle felting, you can make all sorts of items. Felt crafts will go deep into your life
Here are only some suggestions, but don’t hesitate to be creative:
1. Ornaments – many people choose to create animals, but you can also make New Year ornaments in the shape of a Christmas tree.
2. Dolls – you can make beautiful figurines out of felt.
3. Decorative items – this is where you can use your creativity to the max.
You can also make clothing pieces, such as a cosmetic bag, scarf, or hat.
Apart from creating shapes and items from scratch, needle felting also has mending properties. You can use this technique to fix the hole in your favorite sweater or other clothing items!
Chapter 6. Specific Operations on The Needle Felt
It is time for your first felt craft project! In this section, we will show you how to make several different shapes by using the needle felting technique. Take a look at these simple guides and start practicing today.
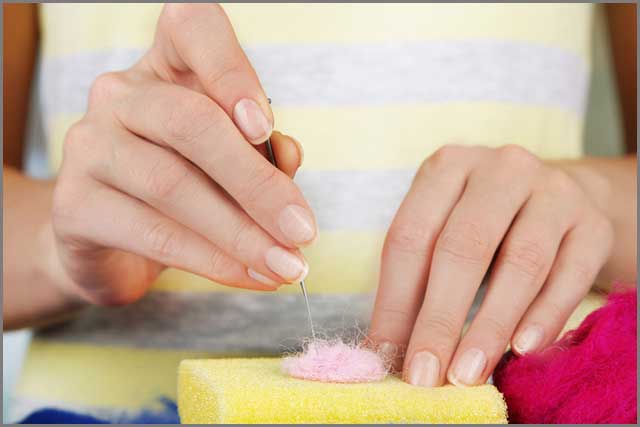
6.1. Flat Felt
1. Grab a chunk of wool and place it on the working service.
2. Start felting with a needle, but make sure to maintain a straight angle. It is the easiest way to poke the wool, especially in the beginning.
3. After a while, turn the other side of the yarn and repeat the poking process. You want to continue setting the felt occasionally until you notice that the fabric is tight.
4. You can now make different shapes, such as squares or triangles.
5. Use the needle to poke the material some more to ensure it fits into the desired shape perfectly.
6. Finally, do some fine tuning by poking the edges.
6.2.Round, Oval, or Cylinder Shapes
1. Grab a chunk of wool and put it on the working surface. Fold one side of the material toward the middle. Keep folding until you notice that you got the round or oval form.
2. Use one hand to hold the felt, and use the other to poke it with a needle. Make sure you poke the wool deep but be careful not to poke yourself!
3. Change the poking angles and rotate the material with your other hand.
4. Once you notice you are close to the desired product, use your hands to rub the content and get the exact shape you want.
5. Do some more pocking and rubbing until you are entirely satisfied with the tightness and way of the felt.
You can also experiment and make other shapes with this process.
Summary:
Needle felt is the perfect activity to show your creativity, and make some stunning shapes and items! As you could see, it is a prevalent technique used by people throughout the world. Feel free to get the necessary equipment and start today. We have no doubt you will enjoy needle felt, and be proud of the things you create!