
For a sensational artist, nothing is more magical than when the hands create miracles and weave on wool fibers, blending them into the most beautiful and brilliant works.
Wet felt dates back centuries and is a traditional method that allows you to diversify your creativity and create a wide variety of crafts. This article outlines guidelines and rules for making wool into stunning fiber art. Shall we?
Table of Contents
- Chapter 1: What Kind of Process is Wet Felting?
- Chapter 2: What Kind of Material do You Need For Wet Felting?
- Chapter 3: What Tools Do You Need For Wet Felting?
- Chapter 4 : Basic Steps and Guiding Principles of The Wet Felting Process
- Lay each tuft in a row on the bubble wrap. Make sure it is arranged in the same direction and are as even as possible.
- 5.Rub the layers flat with your hands after wetting, in all directions, gradually increasing the pressure. Do this for a few minutes before using your rolling pin to roll and unroll the material.
- Chapter 6: Advantages of The Wet Felting Method
- Conclusion
Chapter 1: What Kind of Process is Wet Felting?
Wet felting is the process of melding or combining two or more layers of wool fiber into a single fabric. It is a rather artistic process and involves the application of heat and water to animal hairs and wool fiber.
This causes continuous agitation of fibers and allows them to be perfectly interwoven.
Wet wool allows the epidermis of the fibers to spread apart and interconnect with those of succeeding layers. A controlled amount of water is used, as excess can block the process.
Heat is also important in this process; hot water of about 60 degrees Celsius is usually used to accelerate wet felting.
You might also want to consider investing in a pure olive soap, as an alkaline medium helps the fibers to spread apart even more.
The wool fibers are arranged orderly to prevent difficulties in felting. You can speed up the process further by wrapping it in a sturdy material like a bamboo mat.
Chapter 2: What Kind of Material do You Need For Wet Felting?
Wet felting is a delicate process that involves the careful selection of materials. You do not just want to go in, picking any fiber available, as only certain types of fibers can be wet felted successfully.
Take time to research the type of animal fiber that would work perfectly well and ease the process.
The most popular type of fleece used is that taken from the alpaca or the Merino sheep. Hair from other animals like goats, rabbits, or rodents will also work. The scales in this hair are similar to those in human hair. Applying the appropriate amount of pressure and hot water on this fleece causes the scales to open and unite with each other.
The amount of wool roving needed depends on how large you want your final fabric. Plant and synthetic fibers will not undergo wet felting and should not be used.
Chapter 3: What Tools Do You Need For Wet Felting?
Most of the tools needed are easy to find and can easily improvise. Here are some of them and their uses;
- Bubble wrap-It prevents the layers from felting on each other and allows water to move freely through the fibers. It can also be used to cut out patterns for hollow objects.
- Rolling mat- It is used in place or with bubble wrap, especially when doing a lot of felting. They act as a friction base to speed up the process and allow the fibers to spread out more easily. The sushi bamboo mat can also use as a surface in smaller pieces.
- The towel is used to dry out excess water and is an underlayment for wool fibers.
- Protective nylon tulle- Helps to hold fibers in place while wetting. It provides friction in the later stage of wet felting.
- Soap- It also accelerates the process and acts as an alkaline medium to further spread the scales.
- Hot water- heat and moisture are the fundamental basis of this process. It allows the fibers to adhere to each other easily.
- Sprinkler/Spray bottle- Acts as a hot water reserve and allows a controlled amount of water to use.
- Rolling pin- A cylindrical piece that provides some space to allow the fibers to move.
- Bowl/bucket- This comes in handy when you’re not using a sink. Holds your warm water and allows for rinsing and cleaning.
- Plastic gloves- For hand protection.
- Cutting tools- To cut items when necessary.
- Measuring tool- To measure items.
Chapter 4 : Basic Steps and Guiding Principles of The Wet Felting Process
Prepare your workspace- A fun workspace is a functional one. You need to make your workspace ready for use to prevent obstruction, difficulties, and work hazards. Wood tables and counter surfaces should be protected with a plastic sheet or cloth. You should also prevent the flooring from the water with a towel. A laundry room is a preferred space for this activity.
Place a large towel on your waterproofed table, followed by the rolling mat/matchstick blind or bubble wrap.
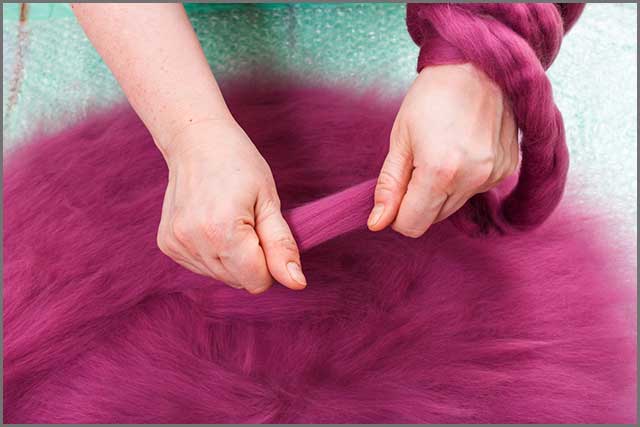
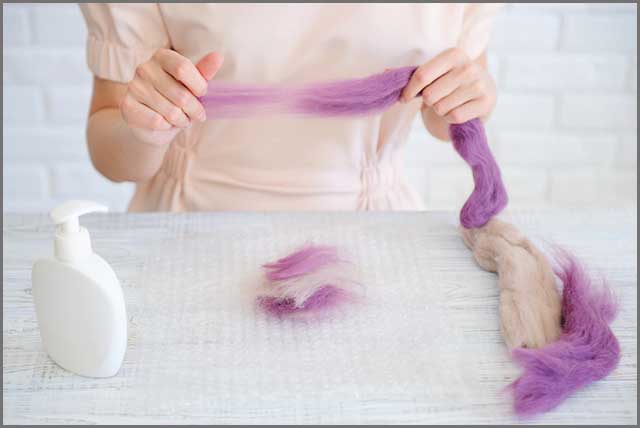
Take a piece of wool roving and pull the tufts from one end. Pull nicely and gently to get long tufts of about 10-15 cm.
Lay each tuft in a row on the bubble wrap. Make sure it is arranged in the same direction and are as even as possible.
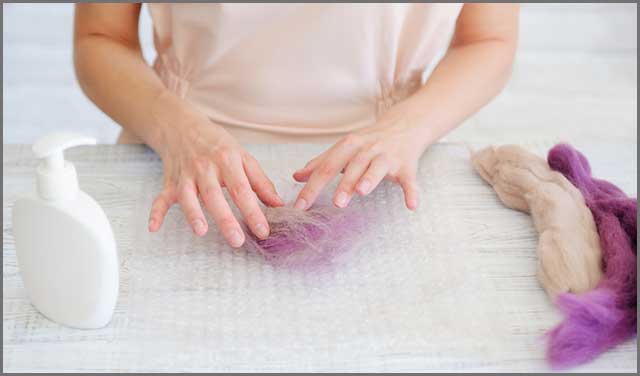
1.Add another layer of tuft in the opposite direction. Ensure they’re even as well.
2.Add the third layer in an alternating fibre direction. You can add more rows. Until you’re sure, your final piece is about 30% larger than the final size of the fabric you want, to allow space for shrinkage. Once the layering is complete, you can add decorations at the top.
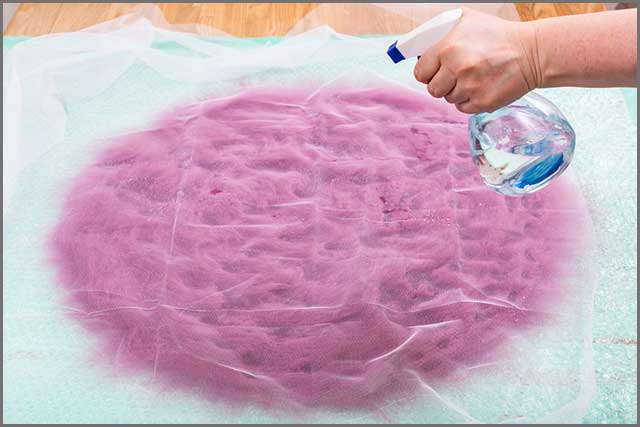
3.Place the netting/tulle carefully without displacing any of the designs.
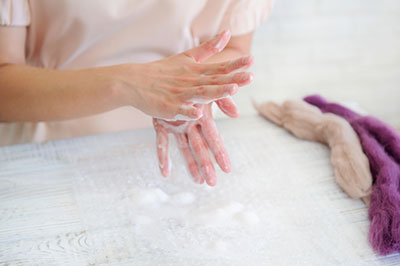
4.Fill the bottle/sprinkler with a mixture of hot water and soap. Spray this mixture on the material. Ensure that the water is not excessive as this can tamper with the process.
5.Rub the layers flat with your hands after wetting, in all directions, gradually increasing the pressure. Do this for a few minutes before using your rolling pin to roll and unroll the material.
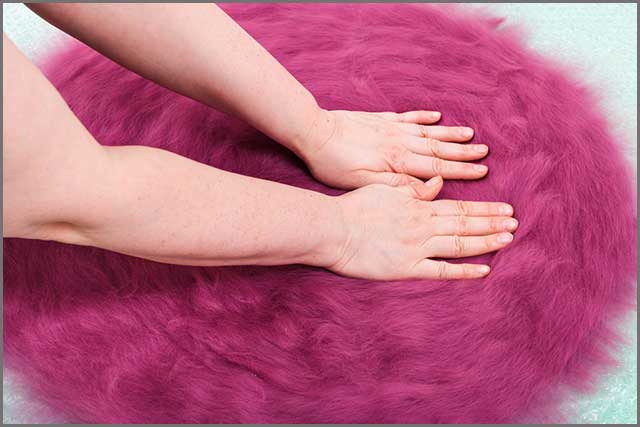
6. Continue the process and keep rolling until wool turns into felt.
7. Test the felt with a pinch test by pulling some layers lightly with your thumb and forefinger. If it holds together, move on to the next step, if not, continue working on the fibers.
8. Rinse the finished felt gentle with water. You can add vinegar to it, to clear up the soap.
9. The fulling stage involves rolling your felted fabric back and forth for a few minutes. This is where the fibers shrink and harden.
10. Throw your piece many times and stretch out your finished felt fabric. Beautiful!
A visual cue and further explanation can be gotten from this video:
Chapter 5 : Popular Handicrafts Try With Wet Felting Methods
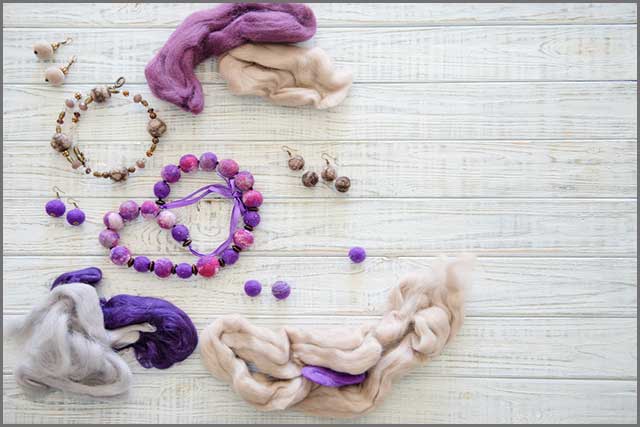
The wet felting process lets you breathe and express your creativity by trying out a variety of colors and crafts. You can alternate fiber, size, and color to your taste. Some of the common artsy crafts to try out;1.Felted scarf- This is an excellent and easy way to start as a beginner. You can try out a variety of colorful wool fibers, interlocking them to make a drop of elegance on the neck or a head covering depending on the season.
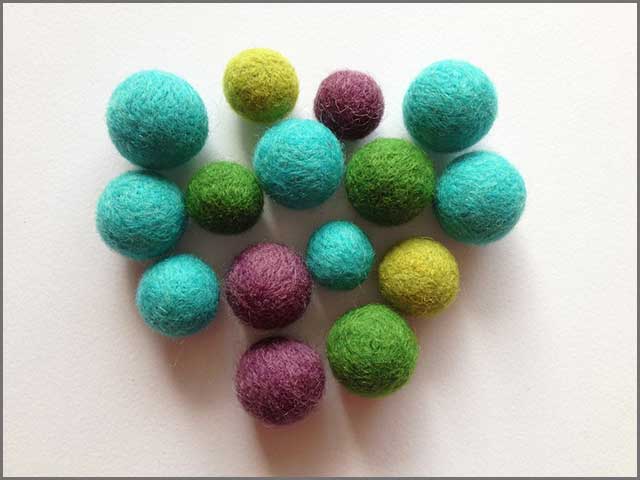
- Felted balls- This is a really fun craft to try out with the kids and to keep them busy. You can have a swell family time by making wool balls for laundry together, and they’re pretty easy to make.
2. Felted animals- You can create felted animals to hang around or decorate your room.
3. Felted rugs- This is a little bit above beginner, but once you have completed the basics, you can pick up designing that rug for your living room.
4. Felted 3D vessels- This is also an advanced wet felting craft. It can be formed using a resist, i.e. a piece of thin plastic between two layers of wool to prevent the layers from felting together.
Chapter 6: Advantages of The Wet Felting Method
This process offers some level of benefit that sets it apart from other methods. Some of these are;
- The materials and tools are cheap, easy to get and improvise
- It is versatile and allows room for flexibility.
- It provides a variety of designs, as different colors of fibers can be interwoven to form a lovely piece.
- It is easy to learn and allows you to experiment freely.
Conclusion
Now you have taken a long-wet felting journey. Feel free to get the tools and experiment. You can try out a variety of wool fiber colors to bring spice and life to that fabric. You can also interchange between merino wool, alpaca, or animal hair. Whatever you do, allow no discouragement and let that inner burst of creative sunshine glow through your hands. Be the magician!