
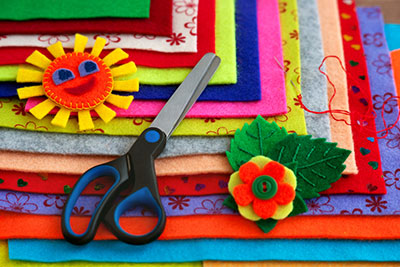
Wool felt is a material that allows you to get extremely creative. There are not many things you can’t make out of felt. In this article, we are singling out the most creative group projects.
These are perfect for gathering friends and family and enjoying felt-making together.
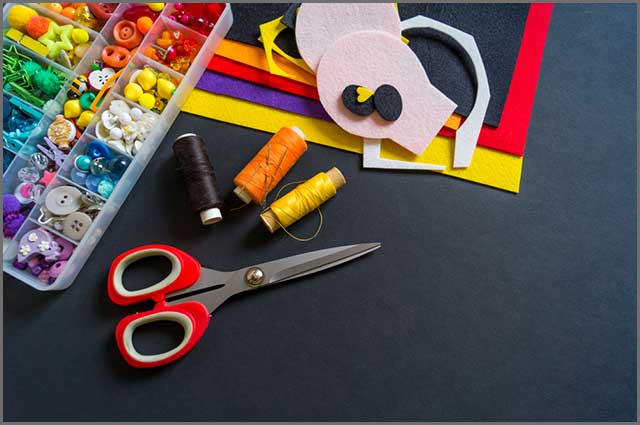
You can also use them in schools as they are suitable for children. If you are eager to get creative, now is the right time to start!
Table of Contents
- Chapter 1. How to Make a Mini Teacup With Felt?
- Chapter 2. How to Make a Patch of Clothes With Felt?
- Chapter 3. How to Make Christmas Tree Decorations With Felt?
- Chapter 4. Wool Felt: How to Use Felt to Personalize Writing?
- Chapter 5. Wool Felt: How to Make Photo Album With Felt?
- Chapter 6. How to Make a Corsage Felt?
- Chapter 7. Wool Felt: How to Make Smartphone Sleeves Using felt?
- Summary
Chapter 1. How to Make a Mini Teacup With Felt?

How about making a tea party, but with the condition that everyone has to make their teacup? See below and find out how to use felt to make a teacup.
You will need wool felt (approximately 25-30 grams per cup), felting needles and mat, and embroidery needles and thread. Before you check out the tutorial for this project, you may want to watch needle felting basics in this video.
- Start by grabbing a chunk of wool in your hands. You want to start by making a strip and then roll it into a tube-like form. Now, use needles to form the body of a teacup. Stick the felt, and use your hands to squeeze the material to keep the required form.
2. Grab a small piece of wool to make a handle. After you have the desired shape, please attach it to the cup’s body.
3. You can choose the desired decoration for the cup. Use a needle to form the desired edges. Feel free to use colored wool for additional decoration.
4. On top of the cup, place a chunk of wool and attach it with a needle.
5. You can also make a saucer. Grab a chunk of wool in the desired color and form a round shape. Feel free to use a sewing needle to add the desired stitching.
Once you have all the cups ready, it is time to make a party! Once the party is over, you can use this teacup as a pincushion.
Chapter 2. How to Make a Patch of Clothes With Felt?

Are you the type of person that wears your heart on their sleeve? If the answer is yes, how about doing that for real? Here is a tutorial on how to make a clothing patch out of felt.
You will need wool felt, scissors, cardstock, thread, marker, and maybe some adhesive. Before starting the project, please choose a jacket or sweater for the elbow patch.
- Estimate the size of the elbow patch you will need for the piece of clothing you selected. You can also use a piece of paper to mark the desired size.
2. Using ready-made fabric, cut out a piece in the desired dimensions. Alternatively, you can grab a big chunk of wool roving and shape it as a heart. Use a felting needle to shape the edges.
3. Place the elbow heart you created on the elbow. You can sew it in with a needle and thread. Make sure to sew all around the patch because you want it to remain in position for a long time.
Chapter 3. How to Make Christmas Tree Decorations With Felt?

You can make any ornaments, but we felt like going with a Christmas theme, which is why we are making a Christmas tree ornament.
The materials required include wool felt, scissors, and needle and thread. Oh, feel free to experiment with felt colors; there is no need to stick to a classic green Christmas tree!
- Grab a piece of felt sheet and cut it into the form of a Christmas tree. If you need to see how you should cut, find a photo of the tree online and follow the pattern.
2. You can use a needle and thread to stitch stars or snowflakes into your tree. Choose the thread of any color, but white may be a logical choice if you are going with snowflakes. The easiest way to stitch a flake is by stitching a “+” and then an “X” at the same place.
3. Feel free to add as many snowflakes as you want.
Now, how about making a stuffed Christmas tree to resemble the real one? Here are the additional instructions:
1Cut out two Christmas tree shapes in identical sizes from your felt fabric.
2. Use needle and thread to stitch them together, but leave them open at the bottom.
3. Grab a chunk of wool roving and stuff the tree. Now, stitch the bottom side, too.
Chapter 4. Wool Felt: How to Use Felt to Personalize Writing?

You can use felt to personalize any gift or item in your home! In this tutorial, we will be using a pillowcase. However, the process is the same because you can “write” almost anything using felt.
You will need a felting mat, needle, wool felt, pencil, and pillowcase (or any other item).
- Make sure the pillowcase is flat (it may be wise to iron it). Take a pencil and write your desired letters or words. It will mark the path you will follow with felt later.
2. Place the felting mat (sponge) into the pillowcase. It needs to be below the actual felting space, so you might need to move it occasionally. It is important to use a mat, so you don’t feel the pillowcase sides together.
3. Grab a chunk of wool felt and place it in the spaces you marked with your pencil. Go one section at a time and use your felting needle to form the letters properly.
Chapter 5. Wool Felt: How to Make Photo Album With Felt?
Is there a better family or school project than creating a photo album? It will be the perfect place to store your memories! Now, we will wrap an existing photo album with felt, which means we can decorate the covers any way we like!
You will need an actual photo album (use a ring binder), glue, wool felt, scissors, and anything else you want to use to decorate the album.
- Open the album and place it over a felt fabric sheet. Use scissors to cut around, but leave some additional space on each side (approximately three inches). Alternatively, measure your album and cut a piece of felt accordingly.
2. Use a bit of glue on one side of the album. Place the felt fabric you cut over that side. You want to be careful so that there are no blobs.
3. It is time to do the edges of the album. You want to wrap each corner and use glue to lock it. You may use clothespins or something like that to help you hold the edges in position while applying glue.
4. Use small pieces of felt fabric (experiment with colors) to decorate the outer sides of your album. Feel free to get creative!
Chapter 6. How to Make a Corsage Felt?
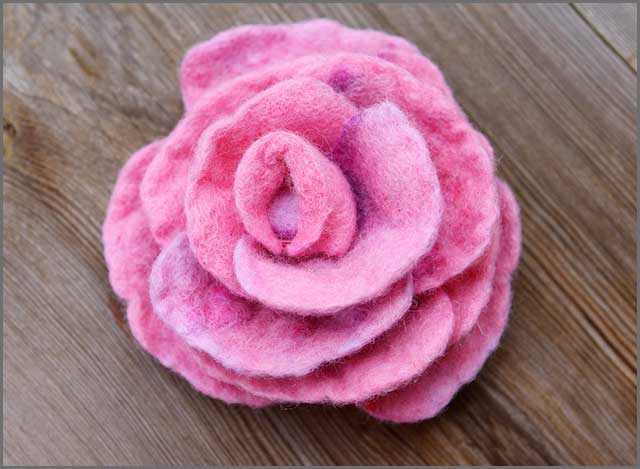
Whether you are getting ready for a wedding or want to wear a flower corsage, here is a tutorial that will help you make them. You will need wool felt (go with flower-like colors, such as red, pink, or white), ribbon, glue, and scissors.
- Take a sheet of felt fabric and cut out a circle. You can choose the desired size, but remember; we will use it for making the flowers. That is why you want to pick the preferred size of the flower. If you have problems cutting out a circular pattern, grab something circular to make your job easier.
2. Now, you want to make a spiral out of the circle. Start anywhere and go toward the inner part of the circle.
3. The next step involves rolling the spiral. This time, you want to start in the center. Try to make the edges even because we need the flower’s bottom to be flat.
4. Now, it is time to make everything more realistic. Take a green color felt and make leaves to add next to the flowers.
5. Take a big piece of felt and place the flowers and leave you’re made on it. Use glue to stick each piece to the surface, and arrange them any way you like. Make sure to be careful so that everything remains clean.
6. Finally, tie a ribbon to the corsage so that you can put it on your hand.
Chapter 7. Wool Felt: How to Make Smartphone Sleeves Using felt?
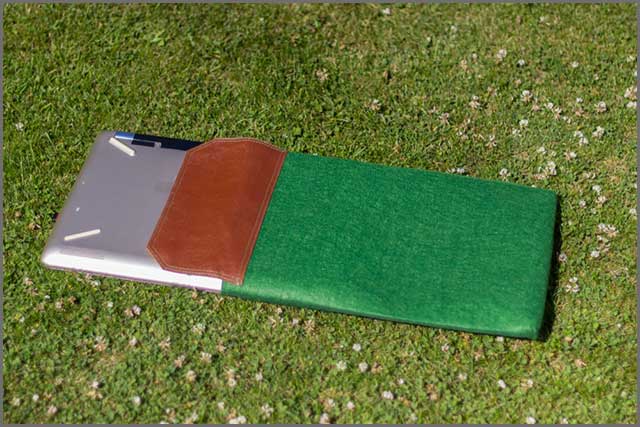
Here is a simple hack that will allow you to be creative and protect your smartphone! It may be the most useful project on this list, and you will need scissors, needles, and thread, and wool felt. Choose any colors you want for your sleeve.
- Grab a chunk of wool, or a piece of felt fabric sheet, and create or cut two big rectangular phones. You want to make them big enough to fit your phone, which is why you may want to have the device nearby.
2. One of the pieces will be an outer layer. You want to make a diagonal cut near the top.
3. Next, put the rectangular piece with the part cut out over the full rectangle part. Use a needle and thread to sew the two components together. Feel free to use small pieces of felt to decorate the sleeve. Put your phone in the sleeve to see if it fits.
Summary
We hope that you liked our creative wool felt projects for groups! Felt is an extremely versatile material, and you can make decorations and useful items by using it. The possibilities are endless, which is why you should turn your creativity mode on, call your friends and family, and enjoy felt making