
One of the most popular and sophisticated felting methods is Nuno felting. This art creates lightweight fabrics by combining layers of wool and fabric. Is essential to have basicNunofelting knowledge if you’re looking to improve your felting skills, as it can be used to make jaw-dropping felted items.
It is also exciting to know that Nuno felting is very versatile and allows you the freedom to experiment. Is might seem a little complicated, but in this article, I will give step-by-step guidelines for making your Nuno felting ride easy and exhilarating. I hope your seat belt is on.
Table of Contents
- Chapter 1: What is Nuno Felting?
- Chapter 2: Nuno Felting What Materials do You Need?
- Chapter 3: Nuno Felting What Tools do You Need?
- Chapter 4: How to Use Nuno Felting and Guidance
- Chapter 5: How do We Avoid Common Mistakes in the Nuno Felting Process?
- Chapter 6: Advantages of the NUNO Felting Method
- Conclusion
Chapter 1: What is Nuno Felting?
Nuno felting, also known as laminate felting, is a beautiful art form. It combines several layers of loose fibers (usually wool) into a transparent fabric, such as silk or chiffon, to create a lightweight felt.
Developed by fiber artist Polly Stirling around 1992, the method involves creativity in building color and design elements. The wool fibers can cover the background fabric completely or be supplemented as a decorative design that allows the underlying fabric to show.
The fibers can be felted to either side of the fabric or sandwiched between two layers. The number of layers will depend on how lightweight you want the end material. The range of weights that can achieve allows various fashionable and exciting clothing to be made with this method.
Layering one layer of loose fiber into an open weave fabric will make a very lightweight material for a summer dress. 3 or 4 layers of fiber on the underlying fabric will make a material of heavier weight suitable for a coat or sweater. The focus is to let the fibers work their way through the weave of the background fabric before entangling. It is achieved by applying heat, water, and friction to the wool fibers.
Chapter 2: Nuno Felting What Materials do You Need?
They are a wide range of fabric choice available for Nuno felting. However, your choice of fabric will determine how lightweight the material will be. Heavier wool or underlying fabric will produce a more elaborate and heavy final fabric. Almost any fabric can use, but silk and chiffon are mostly preferred because they produce a lightweight fabric that drapes well.
Also, use lighter silk fabrics because they are more easily interwoven by wool fibers, making the process less strenuous.
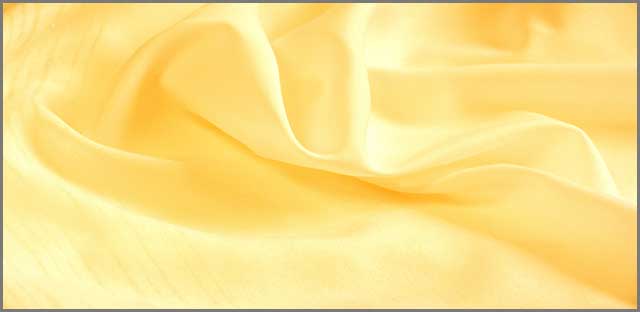
SILK
Silk is one of the strongest natural fibers and produces an edge of beauty and shine that adds a wonderful effect to the wool fibers while Nuno felting. The weight is in momme (mm). The lighter the weight, the easier it is to Nuno felt. Silk with 8mm or less weight is great and works perfectly well for Nuno felting.
Some of the commonly used lightweight silk fabrics are silking gauze or chiffon.
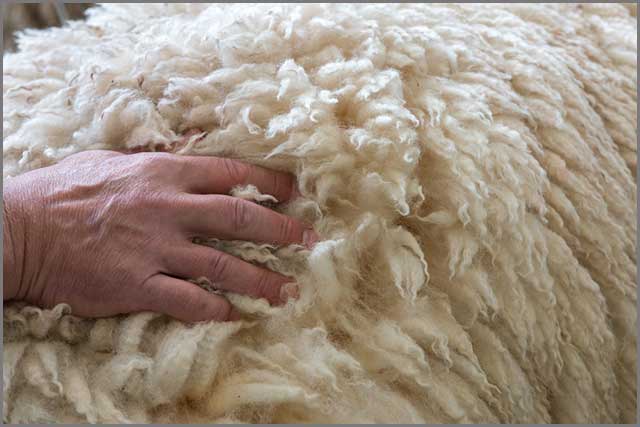
Wool fibers
There are different types of wool and fibers to choose from, and the weight of the wool will also depend on how elaborate you want your final fabric to be. The different wool and fiber types have varying properties and abilities, each unique in its way, creating different surface textures. Merino wool roving or alpaca is the most commonly used.
Chapter 3: Nuno Felting What Tools do You Need?
Here are some of the tools you will need and their uses;
- Rolling mat or bubble wrap- Allows water to move through the fibers easily and helps to agitate the material.
- Protective nylon tulle- Helps to hold fibers in place while wetting. Also provides friction in the later stage of Nuno felting.
- Soap- It makes it easier for the fibers to move through the fabric and entangle, especially pure natural soap, for best results.
- Rolling tube – a cylindrical member to provide some space to allow movement of the fibers.
- Plastic sheet- Used with a bubble rolling mat to minimize the effect of bubbles.
- Water- Used to wet the fabric and fibers.
- Plastic bottle- This serves as a reserve for hot water.
- Rubber gloves – are used to protect your hands while working.
- Plastic or vinyl apron- For protection
- Towels- To clean up water spills or to dry excess water.
- Cutting tools- To cut items when necessary.
- Measuring tool- To measure items.
Chapter 4: How to Use Nuno Felting and Guidance
1. Prepare your work area.
Gather necessary materials needed and arrange them in such a way that they are easily accessible. Prepare a waterproof work surface that can take the length of your fabric.
2. Place the rolling mat or bubble wrap on the prepared work surface. It should be 4-5″ larger than your fabric on all sides. A plastic sheet or protective tulle
should then be placed on the rolling mat.
3. Place a thin wool roving evenly over the protective tulle. The number of layers will determine the thickness of the material. Keep the flat sheet arrangement so that there is no uneven thickness.
4. Place your silk or chiffon on top of the roving and tulle. Your arrangement will depend on the type of design element you’re trying to achieve. You can either place it on both sides or sandwich it between the fabric, so they tangle together. The three design types layouts are; One layer of fiber and one layer of fabric, Two layers of fiber and one layer of fabric, and One layer of fiber and two layers of fabric. A single thin layer is the preferred Nuno felting. You can also set up embellishments on the fiber layer.
5. Make a bath of hot soapy water in the dish tub. These hot water and soap mixtures help the fibers stick together perfectly.
6. Wet down all the materials on your roll-up mat and then roll up the mat, securing it with strips of fabric.
7. Place the rolled-up bundle in the dish tub and apply pressure with your arm or forearm to increase friction. Make sure to apply pressure on all parts.
8. Unroll your bundle, rinse, and dry out excess water with a towel. Repeat the rolling process on your work surface, applying enough pressure till you’re satisfied with the degree of felting done.
9. Test to see If the felting is done by performing a pinch test. Pinch a bit of fiber with your thumb and forefinger, and gently pull up. If it’s holding together, move on to the next stage; if not, continue rolling.
10. Next are the fulling and throwing stages. It will ensure that your fabric is thick and hard enough.
You can check out this video link for more information and a visual explanation.
Chapter 5: How do We Avoid Common Mistakes in the Nuno Felting Process?
There are a few common mistakes made in the process of Nuno felting;
- Wool not felting to silk- A few possibilities can lead to this. First, your underlying silk fabric might be too thick. If this is the case, be sure not to use silk that weighs more than eight momme. It might also be because you’re too aggressive with your rolling. Try and relax your arms while rolling and do it gently. Ensure enough water while wetting, which can also stop your wool from felting.
- Embellishments are falling off- In this case, you might use the wool as the glue as it can act as an adhesive. Add a thin veil of wool wherever you need to stick an embellishment.
- Lumpy felt- This might result from using too thick wool fibers. Use even layers of fibers so your felt doesn’t appear lumpy and messy.
- Your fabric is taking too long to feel- Soap makes the fibers move through the silk easily. If your feet take too long, you probably did not use enough soap and water. Also, ensure that you perform the pinch test before filling.
Chapter 6: Advantages of the NUNO Felting Method
Nuno felting is a beautiful art form that allows you to express your utmost creativity. Here is a list of benefits this method offers;
- It is versatile and can make various fashionable items like scarves, jackets, and summer dresses.
- It provides different design elements to build up color and texture.
- The process is not expensive, and the materials involved are easy to attain.
- It allows you the freedom to experiment and perform tricks on fabrics.
- It is not difficult to learn, and you can easily become a pro with enough practice.

Conclusion
I’m of the unwavering opinion that this article has created a wide burst of creative energy in you. Now, I want you to channel that drive into getting the materials and tools needed and following the steps given. Feel free to create all those stunning and mind-blowing designs with your newly learned art. I assure you that in no time, with enough practice, you’ll be a Nuno felting dei.